hMailServer is a free, open-source, e-mail server for Microsoft Windows. It is used by Internet service providers, companies, governments, schools and enthusiasts in all parts of the world.
It supports the standard e-mail protocols (IMAP, SMTP, and POP3) and can easily be integrated with many existing webmail systems. It has flexible score-based spam protection and can attach to your virus scanner to scan all incoming and outgoing e-mails.
Roundcube webmail is a browser-based multilingual IMAP client with an application-like user interface. It provides full functionality you expect from an e-mail client, including MIME support, address book, folder manipulation, message searching, and spell checking.
XRCLOUD can quickly get the cloud server online, so we can deploy our private e-mail server on the ECS, which is a cost-efficient way for individuals or enterprises. Let's see how to use your private cloud e-mail services on XRCLOUD ECS with hMailserver and RoundCube webmail.
1.The architecture of the cloud email system is straightforward: Front-End of the webmail, email system, database system, of course, we can deploy these components on one cloud server. The followings are the step of how to deploy cloud email service on one ECS.

Figure1.Diagram of cloud email system architecture
2. Get ECS from XRCLOUD.COM: You can sign up and get one ECS from XRCLOUD.COM free. After you register, you can click the free trial button, and then you can choose a Windows 2012 std image for the ECS instance. After the XRC platform launches the instance, you can connect the ECS from the web-VNC, or you can connect from your local windows OS remote desktop client. (Please refer to Figure 2)
3. Download the hmailserver software from the official website: https://www.hmailserver.com/download . Usually, we download the latest version such as 5.6.8-build 2501.
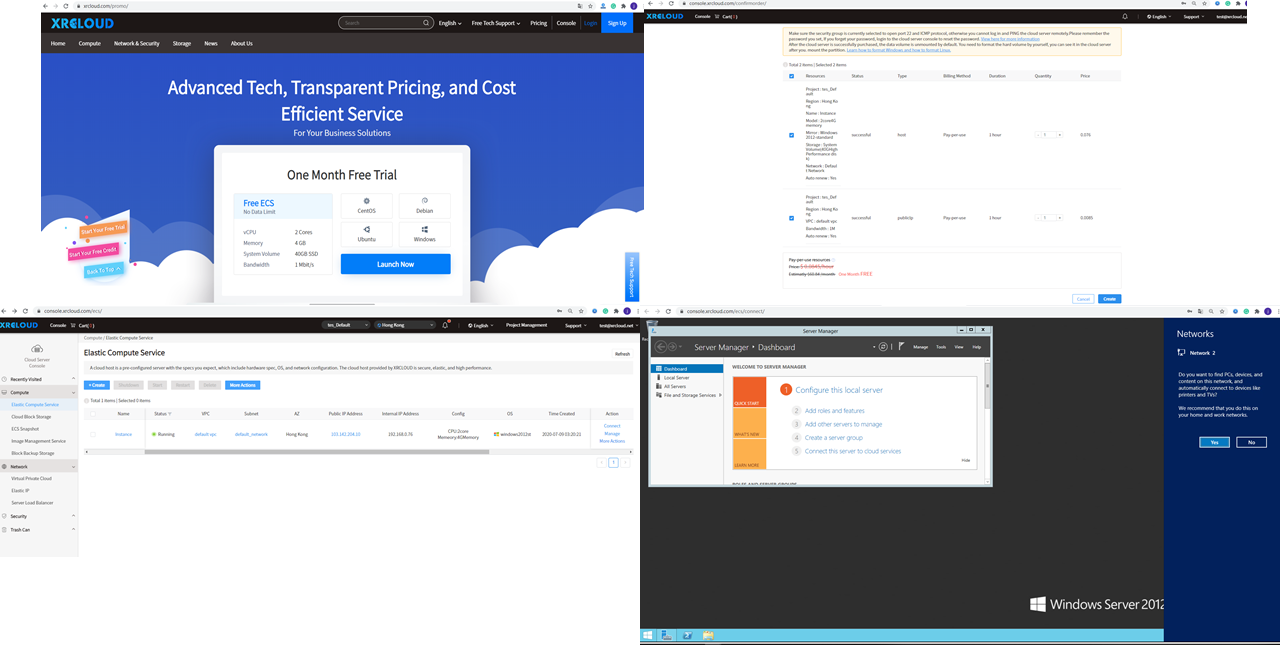 Figure2.Get the free ECS from XRCLOUD.COM4. Afterward, install the hMailserver and configure it:
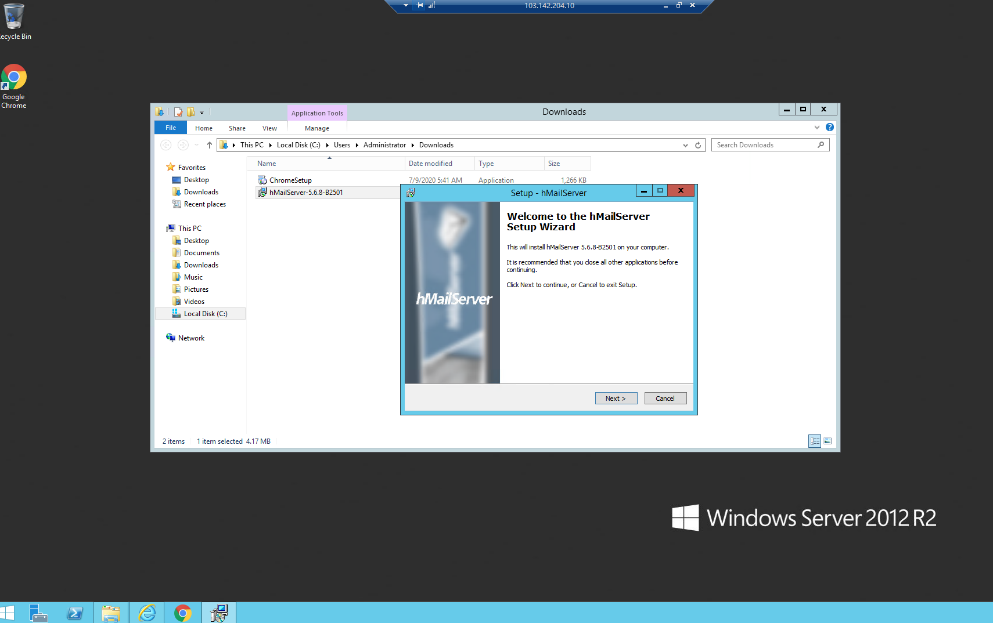
Figure2.Get the free ECS from XRCLOUD.COM

Figure3.hMailserver setup
If you are deploying an extensive business cloud email system, you can install the database separately. In this test, we choose the SQL Compact database, and we can use the software CompacViewer to open the database file.
4.After setting up the database, we need to set up the password for the hMailserver system; for security, we suggest you use a strong password.
Then we finished the installation, and now we need to launch the administrator control panel to configure the software such as email domain, user accounts, the protocols, the ports,etc.
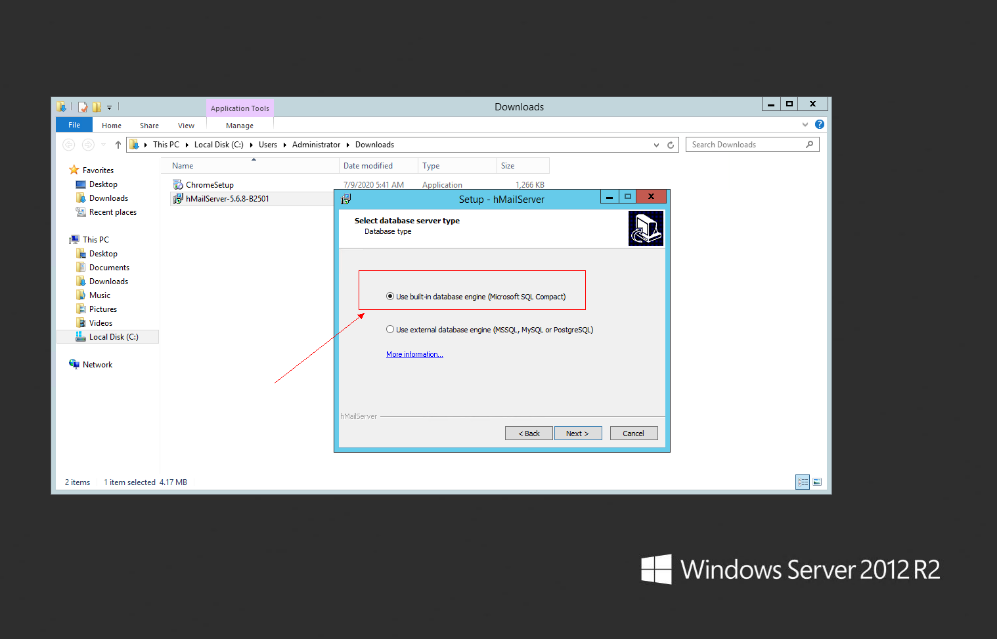
Figure4. Database setup
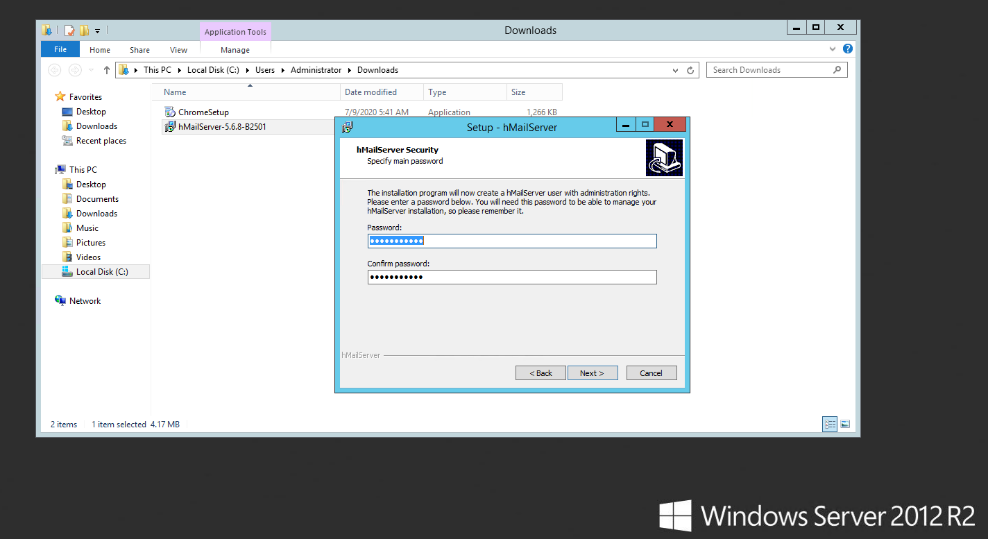
Figure5. Set up the password

Figure6. Launch the administrator panel
5. Configure the hMailserver: We can buy a domain from Godadday.com or another similar website for our email system, then set up the email domain. In this test, we use the email address:test@xrcloud.net. In other words, the email domain is xrcloud.net, input the domain.xrcloud.net, and then save the configuration.
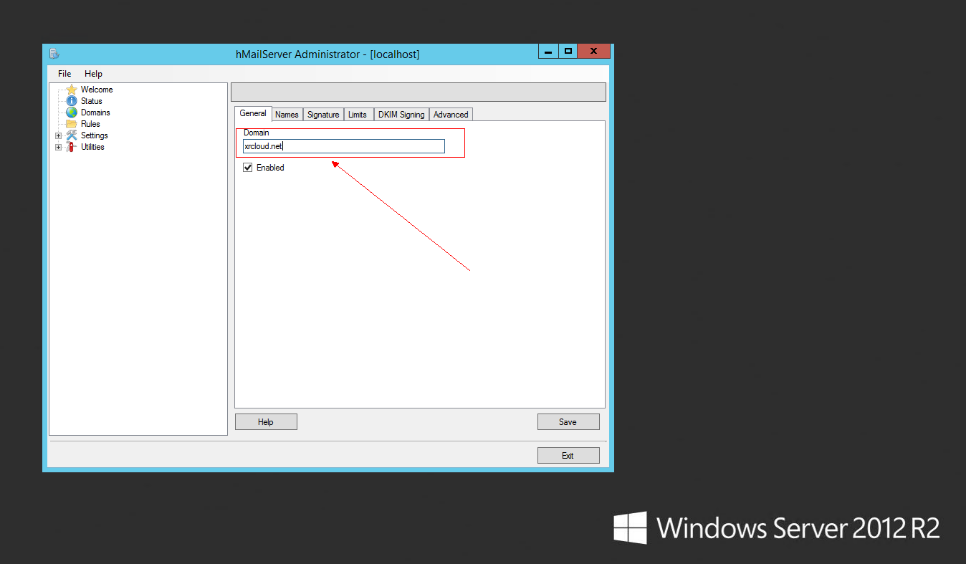
Figure7.Set up the email domain
After completing the domain configuration, we can create user accounts.
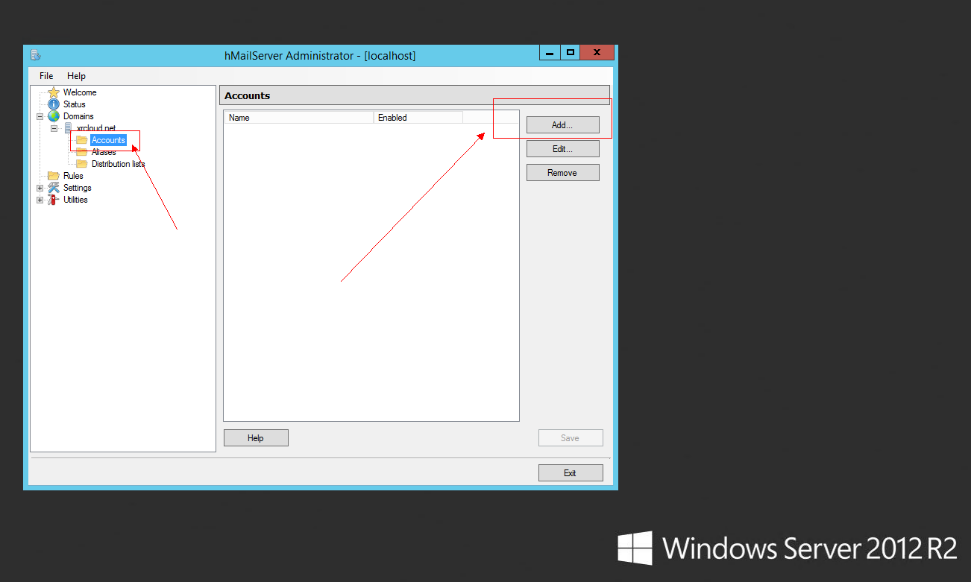
Figure8.Create user accounts
6.Configure DKIM:
Identified Mail (DKIM) is emailed an email authentication method designed to detect forged sender addresses (email spoofing), which is often used in phishing and email spam. If the DKIM doesn't configure for the email server, it will be recognized as a spam email and blocked by the other filters.
How to use the DKIM for the hMailserver, we need two keys: a public key for the DNS resolution and the private key which the email server used to sign each email.we can use free software OpenSSL to generate the keys.
You can download the OpenSSL from the link: https://managedway.dl.sourceforge.net/project/openssl/openssl-1.0.2j-fips-x86_64/openssl-1.0.2j-fips-x86_64.zip,and extract the package to the volume C.Then open the CMD client and go to the OpenSSL software exist directory BIN, now we can generate the public key and the private key.
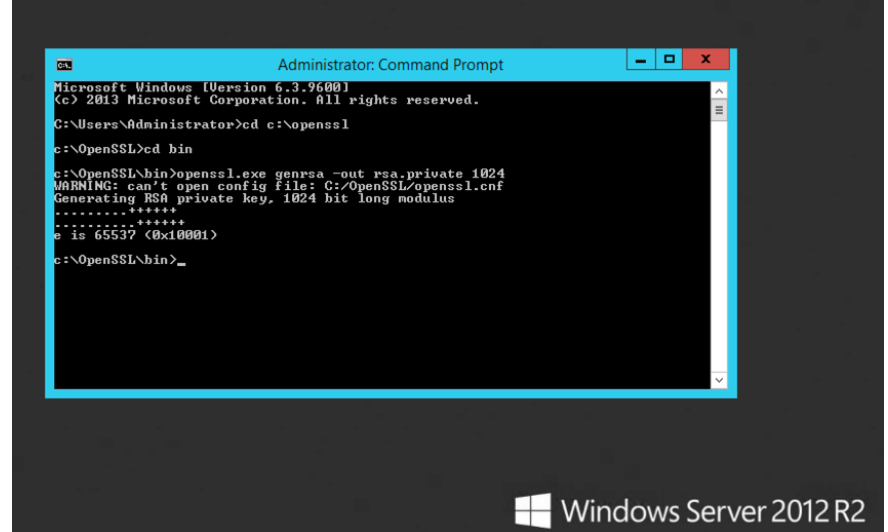
Figure9. Generate the private key
Then we can use the private key to generate the public key.we input command: openssl.exe rsa -in rsa.private -out rsa.public -pubout -outform PEM
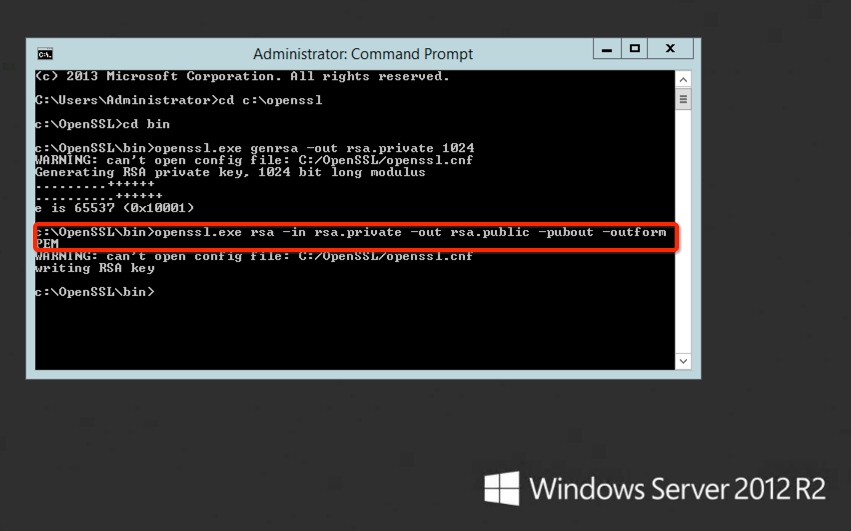
Figure10. Generate the public key
Now, we can see two new files:rsa.private and rsa.public in the BIN directory.
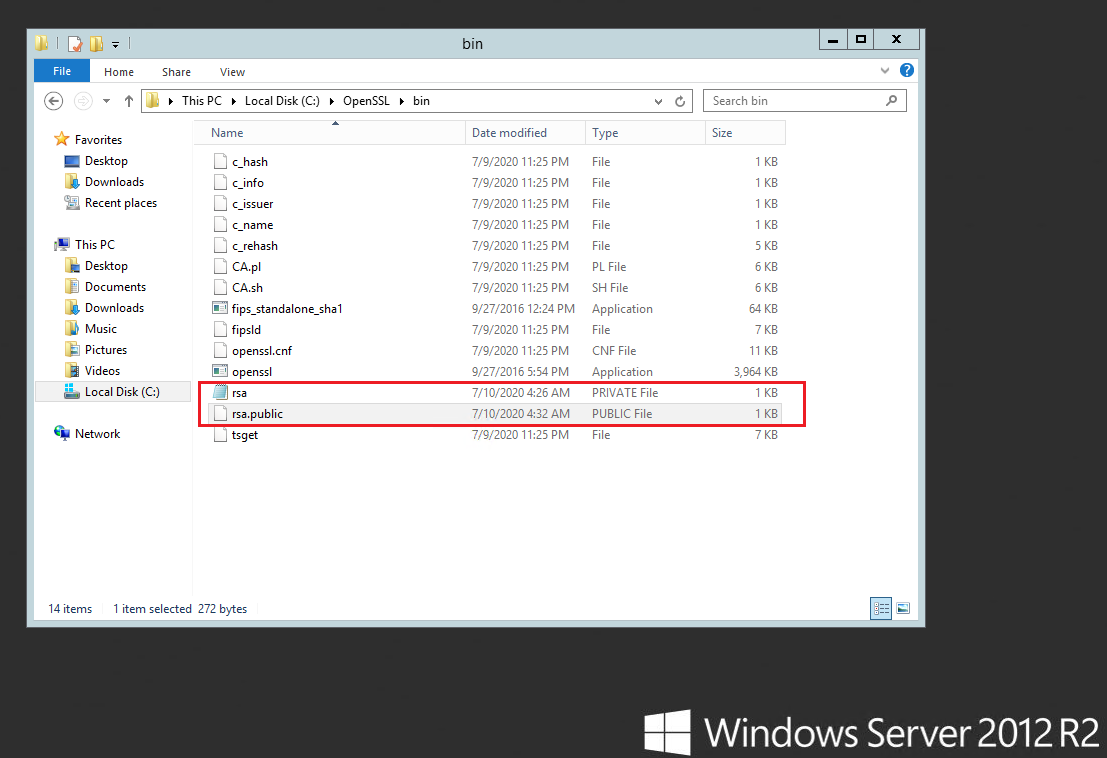
Figure11. Two key files
We can copy these two files to the BIN directory where hMailserver is located so that we can use it efficiently. Oen the rsa.publice with notepad, and copy the content then paste it to you email domain DNS control panel, copy text sandwiched between two dashed lines, don't modify anything, don't copy the dashed-lines, enter to you email domain console panel, and add a txt record for the DKIM, and paste the ras.public key value to the record value.
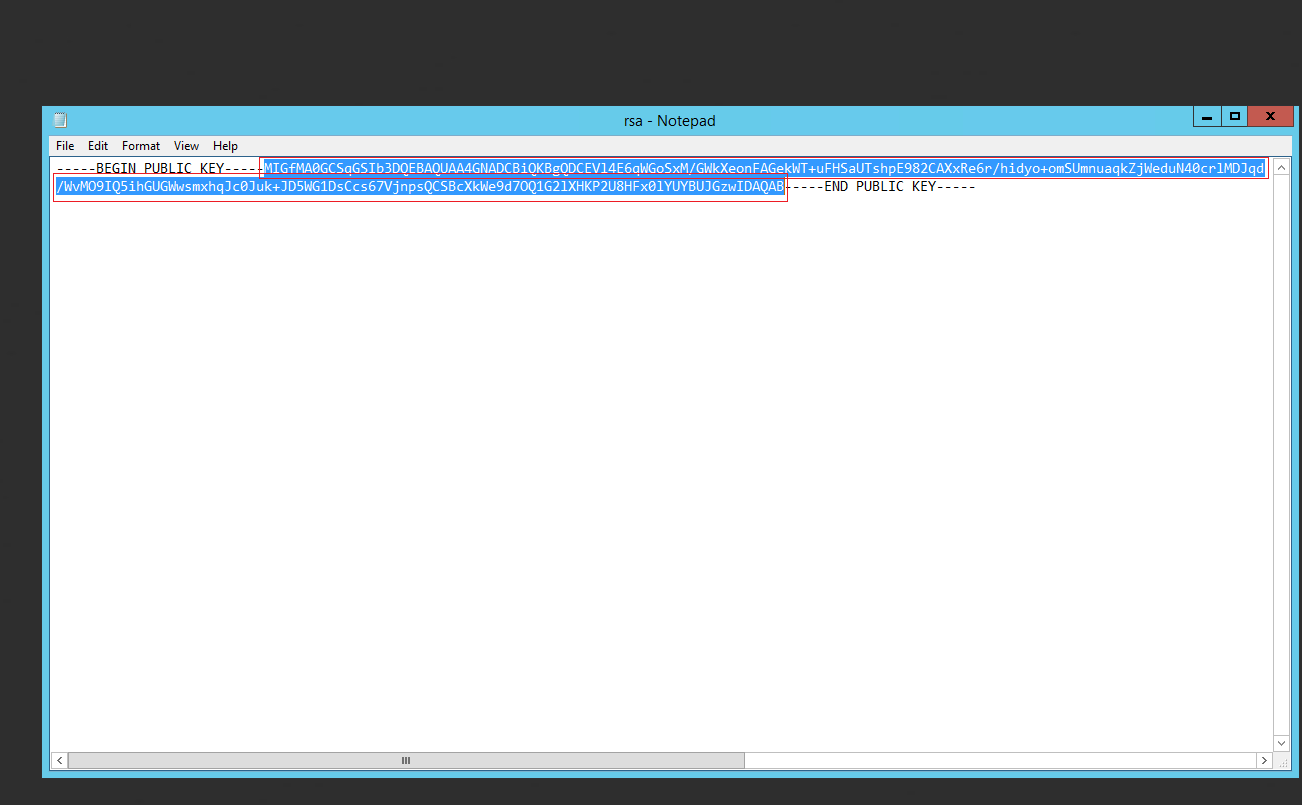
Figure12 Copy the public key
The hostname is webmail._domainkey, the words before the underline must be the same as the selector value on the hMailserver`s DKIM signing.
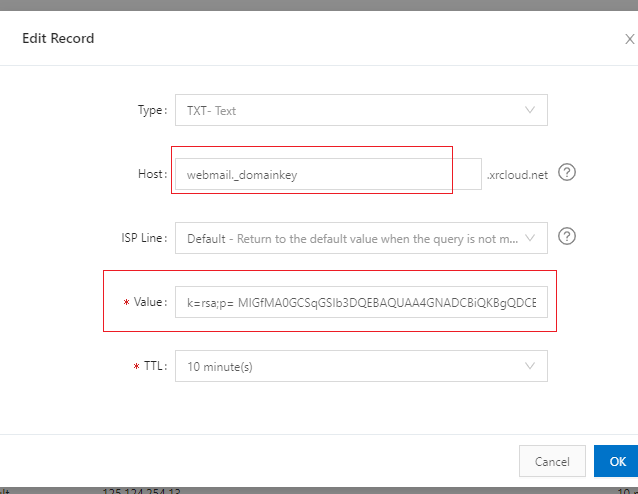
Figure13 Add a TXT record for DKIM
Add the txt record for SPF and DMARC on your domain console panel.
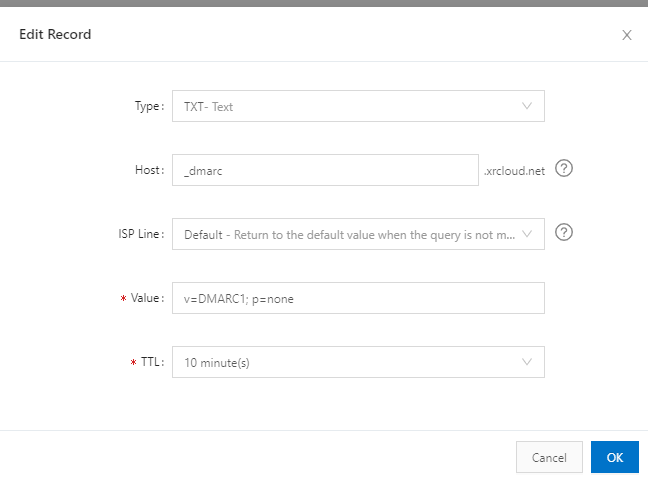
Figure14: Add a TXT record for DMARC
Add a TXT type record for DNS,the Host name is: _dmarc, value is : v=DMARC1;p=none
Add a TXT type record for DNS, the Host name is:@, the value is:v=spf1 a ip4:103.142.204.10 (you should use your email sever`s IP address)
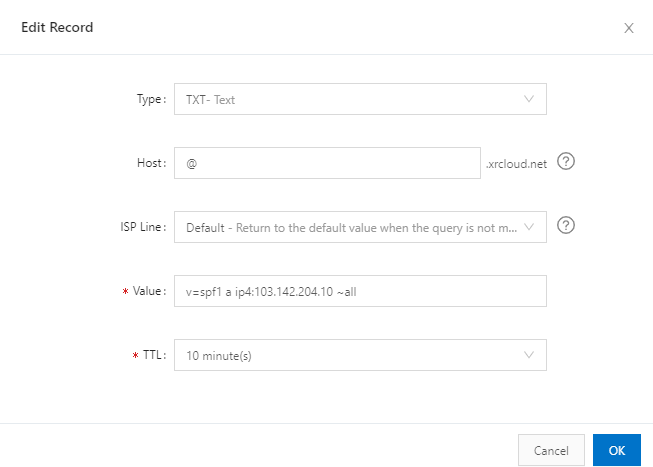
Figure15 Add a TXT record for SPF
That's all the configuration for the DKIM public party; then, we should configure the DKIM signature on the email server.
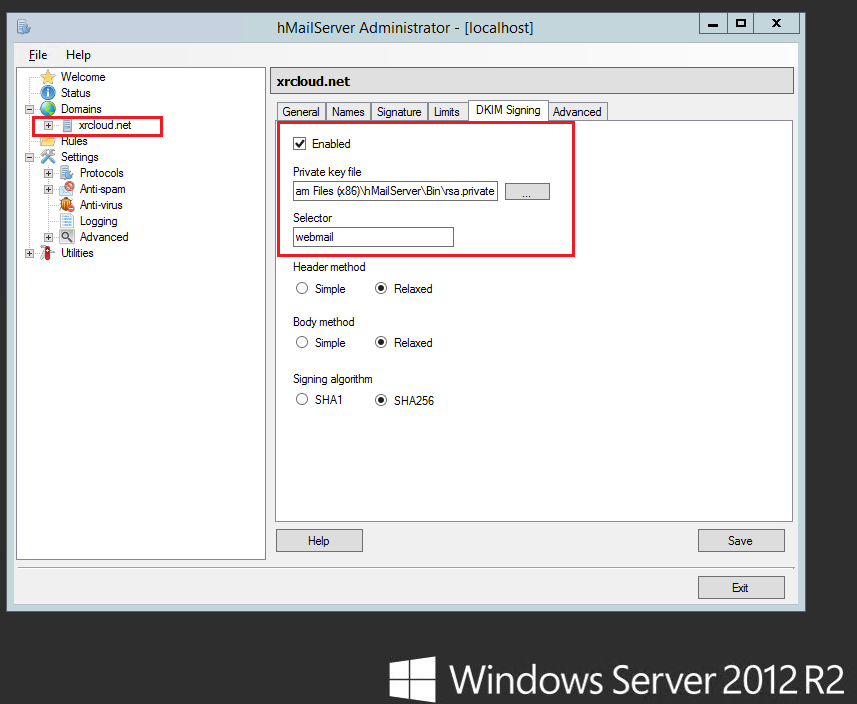
Figure16 Configure the DKIM Signing
Choosing the DKIM Signing tab, check the Enable option, and pick the ras.private file from the hmailserver BIN directory, the selector value is webmail.


 Compute
 Security